Showing posts with label Video. Show all posts

Sunday, 30 July 2017

Sneak Peek - Carols of Christmas Blog Hop

Hello Friends

Just ONE MORE DAY to get your Starter Kit in which you will get the gorgeous, new Carols of Christmas stamp set for FREE!!  And as part of your Starter Kit, you can order the Card Front Builder thinlits too - so you'll have everything you need to create the beautiful cards I've posted here.  AND THEN, beginning on Aug1, you can order ANYTHING you want from the Holiday catalogue (no one else can order from it until Sept 1. Won't all your friends be jealous?!?)
Northern Lights with Card Front Builder thinlits - Plain and Simple


If you live ANYWHERE IN CANADA - purchase a starter kit HERE and join my team, the Canadian Sunshine Stampers - and I'll help you discover the inner crafting genius in you!

Today I wanted to show you how you can use the Carols of Christmas thinlits (Card Front Builder thinlits) and the Northern Lights technique to create a stunning card!

I've created 2 versions of this card.  I think you'll love them both!

For the quick and easy card I created a Northern Lights background and layered the cut-out trees (using the thinlits) in front.  I also used the Carols of Christmas stamp set to stamp a deer (using Chocolate Chip ink) and die-cut him using the Card Front Builder thinlits, then placed him in the foreground.  I added some dots of Fine-tip-glue pen plus Dazzling Diamonds glitter to the sky to simulate some stars, and there you have it.  Easy peasy and very effective.
Northern Lights with Card Front Builder thinlits and Embossing Paste (and glitter) snow

The second card is stepped up a bit.  After sponging my northern lights sky, I used the Card Front Builder thinlits to cut out some stars.  And I used embossing paste on the edges of the tree cut outs, then sprinkled on Dazzling diamonds glitter to create snow on the branches.  I also used torn pieces of Whisper White cardstock and roughed up the torn edge, added embossing paste and glitter, to create some snowbanks.  I layered these with trees at varying depths to create a somewhat snowier scene.

The Northern Lights sky was super-simple to create.  I sponged Daffodil Delight, Tempting Turquoise and Berry Burst onto the central portion of some Whisper White cardstock, then sponged the edges of the cardstock with Night of Navy to simulate a dark sky.  I have a "very quick and VERY imperfect" video that I created this afternoon to show how I made this. 

I also created a video a few years ago to show how easy this is to do (see it HERE) and I hope to post a better video tomorrow on how to create this card.  But trust me when I tell you it is super simple and very, very effective!

Remember, you can create this card too with the right materials.  Get the Carols of Christmas stamp set for FREE (and the Card Front Builder thinlits at a discount and an entire month earlier than anyone else) by purchasing a Starter Kit BEFORE JULY 31!!  If you live anywhere in Canada, then join me and become a Canadian Sunshine Stamper today!

Hope you enjoyed seeing my cards and are visiting all of the other blog participants too!  The list is below.  And trust me, some of these projects are ones you will WANT to make yourself! 

Enjoy the week ahead my friends and God Bless,     Cynthia   <><

  Product List

Sunday, 13 March 2016

March Classes and Great Techniques - the video

Hello Friends 

I am so excited to show you the projects we'll be making next week at my March Club Classes.    

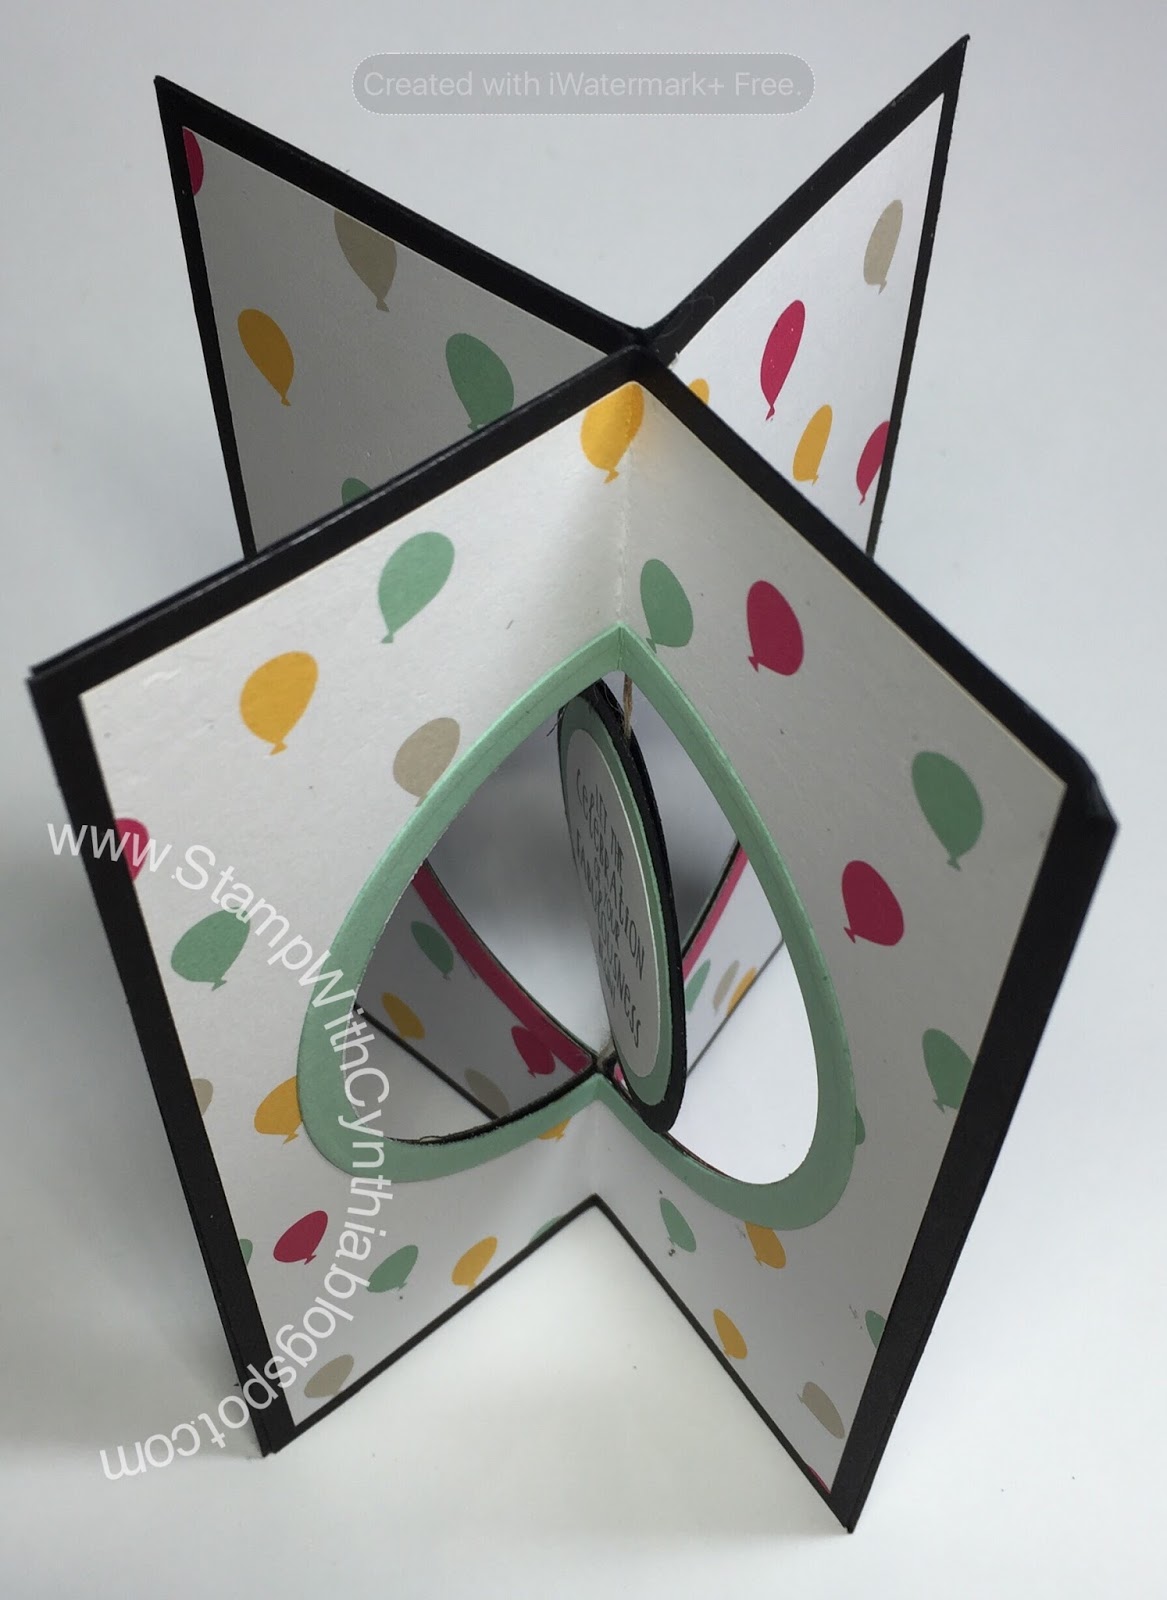
Dawn Griffith's very cool Four-Square Pop-Up card, a Faux Silk card, A great Sale-A-Bration card, and a super-cute Bunny box from the Curvy Keepsake thinlit dies.

I have to admit that I haven't particularly cared for the Honeycomb embellishments - but I am LOVING them as the tail on the bunny box!
Bunny Box from Curvy Keepsake Die

Honeycomb Embellishment Bunny Tail


Four-Square Pop-Up Card


Faux Silk with What I Love (Sale-A-Bration set)

Pedal Pusher and Metallic Tape (Sale-A_Bration items)
I'd love for you to join me for any of these classes at my home in Ottawa's east end:  Tues, Mar 15, Wed Mar 16, Fri Mar 18 (all from 7-9 pm) or Sat Mar 19 (9:30 - 11:30 am).

Fee is $20 or FREE with a $30 order.  And a $60 order gets you your class for free AND ALSO a FREE Sale-A-Bration product of your choice!
RSVP HERE to let me know if you wish to join us.

Have a super Sunday and God Bless,    ~Cynthia   <><

Wednesday, 20 January 2016

Floating Re-Inker - the Video

I posted some VERY popular cards yesterday HERE and was asked to post a video so here it is.  

And UPDATE - adding Wink of Stella at the end really kicks it up a notch.  See the glitz and glitter on these roses?
 
Close up - see the sparkle?


Wink of Stella on the Completed Rose


Watch and see how easy it is to re-create this fantastic effect!

Have a wonderful day, have fun stamping, and God Bless,   ~Cynthia    <><

Wednesday, 25 November 2015

GV Blog Hop - Seeing 3D


Hello My Friends and Welcome to the SU! Grand Vacation - Mediterranean Achievers Blog Hop


Which is a big long name that means -->  Woot, woot!   Thanks to SU! my hubby and I are going on a Mediterranean cruise next May!  So me and a bunch of my very talented friends who all earned the cruise together are participating in a blog hop to show you some gorgeous 3D projects.  I hope you like what I have to show you today.  And I *know* you will love the projects all of my friends have on display.  Don't forget to visit everyone.  And feel free to leave a comment.  Spread the joy my friends!


So what do I have to share with you today?  I decided to show you just how easy it is to create cute little paper earrings using Stampin' Up! supplies.  These earrings are lightweight, fast to create, easy to make, inexpensive and just plain old CUTE!!  Anyone would be thrilled to receive a gift like this from you.  And you could use ANY symmetrical image/punch or framelits to create similar earrings.  Just like I did several years ago in THIS POST. 

The super-cool thing about these kinds of earrings is that they are so fun and so FAST to make!!  Just to prove it to you, I created this video.  Honestly my friends, this cute little project will take you mere minutes!

And who wouldn't want to walk around wearing snowflake earrings?  Right?!?

I need to go now to make earrings from our Christmas Tree punch.  And the little snowman from Snow Place.  And maybe a brightly coloured circle (or 2) as ornaments.  You can never have too many Christmas earrings, can you?

Hope you enjoyed your 3D waltz through my blog.  And don't forget to visit everyone else on the list below.  Hopping is fun and you will be amazed at the sheer gorgeousness of some of these projects!

Have a terrific rest-of-the-week and God Bless,    ~Cynthia   <><

Wednesday, 14 October 2015

Adding Shimmer to a Card - the first video

My apologies my friends

I tried making a video tonight using my iphone - since the photos that it captures are FANTASTIC quality.  Well - either I don't know what I am doing, or my regular camera is a better quality than I thought, because the video made with my iphone is NOT good quality whatsoever.  However, I will post it anyhow, until I have a chance to make a new and better quality one to replace it!
Shimmery Stamped/Embossed Card
Can you see the shimmer?

In a nutshell, last year I used Iridescent Ice embossing powder to create a spectacular Christmas card that shimmered and glimmered like there was no tomorrow.  You can see that card and video HERE.  Well today I want to show you that you can use the same technique to 'step up' almost any card.  Here, I've used the technique to glimmer up the gorgeous card I created by stamping directly on the embossing folder. 

I promise when I get home form work tonight I will try to make a better version of this video.  But for now...you'll get the idea.

Here you go friends:
 
Have a wonderful day and God Bless,    ~Cynthia   <><

Sunday, 26 July 2015

Founders Circle Friends Swap - Three-Windowed Swap Card - the Video

Hello Friends.  

I have had a LOT of interest in this card I posted last week (see the original post HERE) and I promised you a video to show you how easy it is to produce so here you go.

Enjoy watching.  And I hope your summer is fantastic so far.  

Mine?  My summer has been SPECTACULAR!  And it is not over yet!     :)

Have a wonderful rest-of-your-weekend and God Bless,    ~Cynthia   <><

Saturday, 27 December 2014

Butterfly Thinlits Sneak Peek and a Video - Using Dryer Sheets to Remove Confetti Bits From Diecuts,

Hello Friends - I am SO EXCITED to show you this video!!
Easily Diecut and clean up Intricate designs, like this Butterfly

Karen Burniston came up with an absolutely brilliant way to use dryer sheets to quickly and easily remove all those annoying leftover confetti bits from a framelit or thinlit after you have cut your cardstock - and I tried it using our new Butterfly Thinlits (which you can order beginning January 6, 2015 when the Occasions Catalogue goes live)

And it works!!

It is so easy and so fast - I just KNEW I had to let you all know about this fantastic technique.  Watch the video and see just how easy it is.

I hope you enjoy how fast and easy it is to clean-up even intricate diecut images.  No more poking all the bits of confetti out.  Hurray!!

And I hope everyone enjoyed their Christmas and is still relaxing before the New Year arrives.   
God Bless,    ~Cynthia   <><  


Friday, 19 December 2014

Work of Art Snowman - Fast and Fabulous Friday Video

Hello My Friends

I saw the cutest card on Pinterest and I cannot seem to track down who the original designer was - but I wanted to re-create it for you to show you just how easy and quick it is to create a cute Christmas card.  

This is definitely a Fast and Fabulous card.  Watch the video and you will see that the actual card only takes about 60 seconds to make (the explaining took longer than the making....)

At any rate, I made one in about a minute on-screen.  Then I made a ton more after I had stopped filming.  

Lots of my customers will be getting this card with their December order.  So I hope they like it!

And I hope everyone is looking forward to a wonderful weekend and a fabulous Christmas.  
God Bless,   ~Cynthia  <><

Friday, 17 October 2014

Founders Swap - Shimmery Pines, the Video!

Hello Friends
Shimmery Pines (Founders Circle Swap)

Its is easy to create lots and lots of these gorgeous, Shimmery cards


I have been tickled pink  and on cloud nine for the last few weeks.  Ever since I returned from Founders Circle in Utah in September I have been getting tons of e-mails from all over Canada and the US with people asking me how I made my Founders Swap card - the super shimmery Ornamental Pine card.

The short answer is - it is super easy.  Just Versamark and Iridescent Ice embossing Powder.  But if you really want the whole scoop, take a few minutes and watch the video I put together for you.

To be honest, I wanted to make a video of this card anyhow, but the huge interest in it meant that I needed to make it sooner, rather than later.

So here it is folks.  Enjoy!
And have a wonderful weekend.  God Bless,    ~Cynthia   <><

Tuesday, 11 March 2014

Stamping on Designer Paper - the Video

Hello Dear Friends

By now you *must* have seen my previous posts about stamping the Swallowtail image onto the Sweet Sorbet Designer Paper and heat embossing it!  I posted about it as a Fast and Fabulous Friday and showed you even more variations on Saturday.

Well, just to prove to you that this really *is* a fast and fabulous card to create, I made a video of me making one of the cards.  Honestly, I think if I did not talk as much in the video, it might have taken me less than 2 minutes to actually create the card - start to finish!  But since I decided to explain and talk while I made it on camera, the video is all of 4 minutes long.


Even at that - Fast and Fabulous I tell ya!

Have a spectacular day.  More March Break fun in this household but I'll be back tomorrow.  
Till then, take care and God Bless,     ~Cynthia     <><

Monday, 24 February 2014

Making Paper Roses - the Video

Hello Friends

If you saw yesterday's post, you know how gorgeous the flowers are that you can make using the Spiral Flower Die from Stampin' Up!.  Well today I am here to show you how quick and easy they are to make too!  All you need is the Spiral Flower Die, some cardstock, something to wind around (I like a bamboo skewer), and an adhesive (I prefer a hot glue gun but you can use Tombow Multipurpose liquid glue).  Watch the video to see how to make paper roses that you can use for all kinds of gorgeous projects!
A Rose tree

Hope you found this helpful.  Contact me today to order your Spiral Flower Die and start creating a garden of gorgeousness.
Roses on Pillar candles

Roses on a Picture Frame

Close-up of Paper Roses on candles


Hope everyone enjoyed a wonderful weekend!    
God Bless,    ~Cynthia   <><

Sunday, 18 August 2013

A Helpful Tip For You - Video

Hello Friends

I learned of a very helpful little trick a while ago and I wanted to share it with all of you.
 Ever use Snail (2-sided tape) and been annoyed at the way your work surface becomes very tacky with glue residue?  Or...ever have trouble getting Snail onto a very small or narrow element without also getting adhesive onto everything else?


Watch this little helpful-advice video to show you a great way to prevent a sticky mess.


Hope it helps you as much as it has helped me!!  God Bless,    ~Cynthia   <><

Thursday, 15 August 2013

Fixing "Broken" Ink Pads

Hello There

I have received several phone calls over the last year from friends whose Stampin' Up! ink pads have accidentally come apart.  You know - when the lid and the base are no longer attached.  This doesn't happen often, but when it does, I have heard some pretty colourful language being spoken.  Colourful enough to be worthy of Stampin' Up! ink - that's for sure!

At any rate, I have been promising for quite some time to make a video to show how to reassemble the SU! ink pads when they come apart, and at long last, here it is.

Hope everyone enjoys a terrific end to their week!
God Bless,        ~Cynthia      <><

Tuesday, 13 August 2013

Thinlit Circle Die Video - Delightful Dahlia Flip Card

Hello Friends

It took me a while but I managed to figure out the "video thing" without the help of my teenagers.  I am certain I will get better at it as time goes by.  But for now, here is the video How-To for this morning's Thinlit Circle Die card.

The Circle Thinlit Die (cat # 133480) and all the wonderful accompanying framelits can be seen here.

And the Label Framelit Die (cat #133479) and all the cool things that come with it can be seen here.

Enjoy the rest of your day and God Bless,    ~Cynthia    <><

Sunday, 24 February 2013

Designer Paper Flowers and a Video

Hello Friends

I was honoured and blessed to be a part of a Crop to raise money for the Neeje Association For Women and Families yesterday. 

What a thoroughly wonderful day.  This is the third year the crop has run and it gets better every year!

If you saw my post yesterday, I promised that today I would post a video showing you how we made the gorgeous corsages that we gave to each of the participants.  I probably should have waited to film it until today (I did the filming last night after the crop and I was pretty tired.....but I think you'll forgive my few little stutters.  Please?!?)


Let me know what you think.  And let me know if you'd like to see more videos.  I figure I can only get better at them...right?

Hope everyone had a wonderful weekend and is looking forward to more of the same this week.
God Bless,   ~Cynthia   <><

Sunday, 17 February 2013

Multi-Coloured Chalkboard Technique and a Video!!

Well friends, this is it.

If all goes well, when I hit "Publish" there will actually be a video linked to this post.  I hope it works.  And if it does work, you can all watch and see how easy it is to do mutli-coloured embossing as a Chalkboard technique.


This is my first attempt at a video.  I hope it was successful.  Let me know what you think!  I'll be very interested in your comments.

In the meantime, have a wonderful weekend (a long weekend for the US and for many of us in Canada).  God Bless,       ~Cynthia   <><